
Wii Remote with Nunchuck


When I felt like I didn't have an awful lot more to give, I played around with some pretty lighting after accidentally clicking on the rendering tab, forcing my mind to vaguely remember some of Lothar's lessons during BA1 directed study.
Overall I'm really happy and impressed with myself. I can see how it could be a little prop in a scene somewhere despite the low quality images for the buttons and the fact that I forgot to round off some of the edges... nevermind!
C-Arm X-Ray System


Additional Research: Upcoming use of 3D printing for medical application

 |
| One of my reference images |
 |
| This screen shot was taken quite far into the project when I started refining smaller details |
With all of the directed study tasks, I finished them off at home. I didn't bother documenting them with screen shots too heavily because I felt that it was more important to just 'do it' for now until I understand what I'm doing better to be able to annotate it with any authority. I also kept details to a minimum because I wanted to just master the basics. Anyway...
I started the initial remote with the cube primitive, and matched it up to an image on a 'free image plane' using the transformation tools. I added 3 divisions on each axis so that I had some faces to pull up the indentations in the bottom and also to be able to divide the faces up later on using the interactive split tool which is my best friend. The nun chuck was actually formed from a cylinder with a smoothed cap and deformed primarily by manipulating the vertexes by hand which took forever and in hindsight I could have just used the create polygon tool to get the strange shape on the bottom and then split the sides to form a more rounded shape... nevermind. The joystick was formed from a hexagon created on the top of the nun chuck, then I used the extrude and transformation tools to pull it in and up and in and out. I used the smooth tool on the bottom to make it look more like a ball. I created the clean lines at the side by using edge select and extrude. The nun chuck is by no means perfect, but to me it's mint and I love it because it took me so long I might as well get some joy from it. That's basically all to talk about for the nun chuck, it wasn't overly technical, just super fiddly and meticulous.
Once I got the basic shape for the main controller I created buttons and placed them on top of the remote with the help of our good friend snap to grid. This is where I began constantly switched between orthographic and perspective views using the space bar and some insane hand eye co-ordination and speed. The buttons were all simple to make. The trigger on the bottom of the remote was created by selecting the faces which was made easier by previously dividing my shape earlier, then extracting them into a separate object and then extruding it with a little bevel around the edges for smoothness.
The wire was created using the EP curve tool which looks really scary but I think I've got a grasp on it now. I created a cylinder and switching to the orthographic side view I deleted everything other than the top faces. This was to be the width I wanted my wire and put to one side whilst I created the EP curve and then deformed it using control vertexes and curve points with the transformation tools. I moved my circular face to the start point of my EP curve once I was happy with the shape and shift clicked both and pressed extrude. I added 100 divisions because that gave a nice shape and I didn't care about the polycount. To get rid of my EP curve I selected my wire in object mode and deleted the history 'by type' in the top menu.
 |
| Top orthographic view of Wii Remote showing the 18 holes |
The most meticulous part of creating the remote was creating the 18 small holes that are placed under the Home button and I'm not really sure of their purpose. The first stage in this was creating a face that I could duplicate onto existing holes and merge with the remote. To do this I created another cylinder removing everything but the top face. I made sure I divided it so that I had 2 rings on the top face. I moved the vertexes using the snap to grid tool and transformation tools to create a square around the inner circle. After doing this I removed the edges to make a clean shape and deleted the faces of the inner circle leaving me with a hole inside a square pictured above. Next I divided the faces on the top of my remote using the interactive split tool. I found out during this process that by pressing 'G' on the keyboard it selects your previous tool which sped up this tedious process. Once I had enough divisions to create 18 holes in the top of my remote which were central on the top face, I duplicated my square with a hole over the existing holes to begin merging.
Using the merge vertex tool after combing all 18 square with holes to the remote in 'Mesh', I fused together my holes with my other holes... it didn't actually take that long, it just required a lot of concentrating. Just to note I tried to align the holes in the side orthographic view as best as I could which was a bit finicky but I managed it in the end.
I thought I would try minimal texturing to get some detail on the buttons. I just cut out bits from my reference image and filled the buttons with them as materials and warped the shape of the UVs to fit the image, which I now know is bad, but it worked for the intended purpose.
 |
| Finished product |
When I felt like I didn't have an awful lot more to give, I played around with some pretty lighting after accidentally clicking on the rendering tab, forcing my mind to vaguely remember some of Lothar's lessons during BA1 directed study.
Overall I'm really happy and impressed with myself. I can see how it could be a little prop in a scene somewhere despite the low quality images for the buttons and the fact that I forgot to round off some of the edges... nevermind!
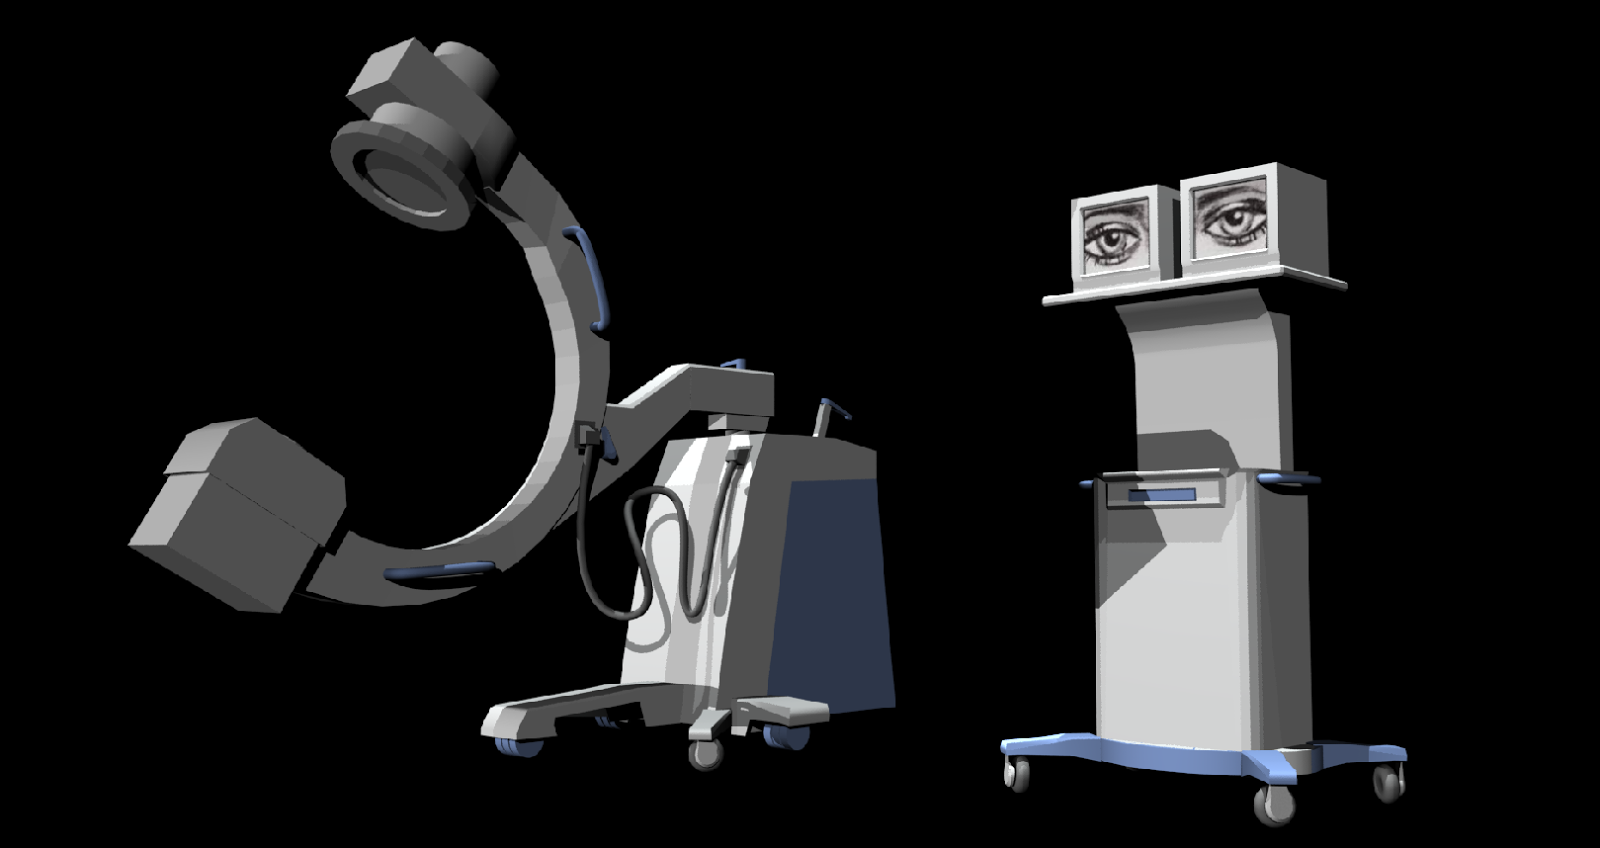
C-Arm X-Ray System
 |
| This is the image we were given to work from |
At this point I had developed a basic understanding of using different primitives, tools and navigating the software better so I will just talk about interesting points rather than the whole thing because its 2AM and I have a date with Harry Potter and the sofa.
Handles - Created using the EP curve tool and aligned to the grid using snap to grid and transformation tools in a top orthographic view. I reduced the points on the curve to be able to achieve much better symmetry.
C-Arm - Created from a cylinder and deleting segments in the orthographic views to end up with a crescent shape. I think that I should have had more divisions in the initial cylinder to achieve better smoothness.
Wire - Created using EP curve with control vertex and curve points in conjunction with the transformation tools.
Handles - Surprisingly one of the more complex parts. Created from a cylinder and cube. I deleted faces from the cylinder and cube combining them to merge the vertexes together using the merge vertex tool. I added points using the interactive split tool to merge the cube with the center point left over from the cylinder. In hindsight I could have just deleted that vertex using the deleted vertex tool.
Wheels - Made from Polygon Torus and a spare circular face that I had floating around. I was a bit lazy with the wheels because at this point I just wanted to move onto something else. I had fun manually working out the rotations needed to get a symmetrical finish for all 4 wheels.
Curved Apparatus - Created the curve by adding divisions using the split polygon tool then using transformation tools to control the vertexes into a curved shape.
Once I was happy with the overall shape I went ahead and added textures by holding the right mouse button and assigning 'new material's, selecting lambert as the shader and filling in the colours according to the reference image. I was a bit silly with the images on the TV screens but whatever. I added lighting and then played around with the render settings and I used mental ray and HQ screen sizes.
Additional Research: Upcoming use of 3D printing for medical application
10/10 best tutorial by the pest person
ReplyDeleteOh my sweet dear, this is not the tutorial, but thank you ;D
Delete